Email me if you are interested in custom pet portraits!!
Welcome to Painted Preppy your one stop source for party and decor inspiration. Follow us to receive party ideas for kids and adults, as well as recipes and home decor inspiration. Founded by Jennie Brown, interior designer turned animator/interactive designer.
Pages
Monday, March 29, 2010
New stationery designs!
Email me if you are interested in custom pet portraits!!
Sunday, March 28, 2010
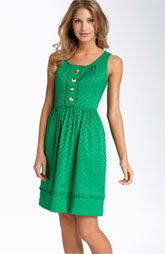
Easter dresses
Saturday, March 27, 2010
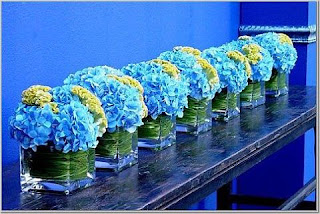
Hydrangea Tablescapes
Thursday, March 25, 2010
Estate of the day
I love anything to do with old hollywood and I came across an article today about the home of Harry Warner. It was bulit in 1923 by the studio founder, in the Hancock Park area of Los Angeles. It is a georgian colonial and was designed by famed architect Burnside Sturges, it sits on a corner lot and includes a tennis court, pool, and a guest house. It really is a jewel of old hollywood, because not much has changed about the house since it was built in 1923, it has preserved the charm that only that era can produce. The basement still houses the original screening room that he would use at home to view the current movies Warner Bros. was producing at the time. I have included many pictures of the old home, it was quite a house in 1923, enjoy!
Wednesday, March 17, 2010
Green eye candy!


In honor of St. Patrick's day I have found some of my favorite green images, from shoes to wallpaper, here's a little green eye candy!
Saturday, March 13, 2010
Eco bags to die for!


I love these new eco bags that I found, I am still working on putting them up on the site, but wanted some opinions on what my blog followers think about them. They come in amazing colors and stylish designs, perfect for groceries or books or just a cute little bag you need to carry your lunch or newspaper. The prices are great, they range from $6-$20 dollars a bag.
Plase leave feedback and let me know your opinions!
If you are interested in purchasing email me I haven't finished putting all the bags on my website yet.
Have a great weekend.
Tuesday, March 9, 2010
Easter tablescapes


With Easter quickly approaching I have already started thinking about my Easter tablescape this year. I am thinking about using green and white linens this year, possibbly polka dot napkins in green and white, how cute is that! I have been searching for many other ideas and I thought about last year when I painted wooden easter eggs and then monogrammed them with everyones initials to use as place cards, it was a big hit! This year I stumbled across napkins that were folded in the shape of a bunny and I think it is a must do for this year, I have included the picture and directions below. I then moved on to china, I have a few sets of Easter china that I rotate every year, but I thought it might be fun to design my own this year and hand paint each plate.......most likely I will monogram them as well!
Here are a few inspiring pictures that I came across to help me pull my table together, I am definately getting grass (plastic or real havent gotten that far yet)to lay down the center of my table, love the idea of that!
Enjoy!
Napkin directions:
Step 1
Take a solid-colored square napkin, and starch it for optimal workability. Thinner napkins work better, so choose a linen napkin over a thick cotton one
Step 2
Fold the napkin in half.
Step 3
Fold the napkin in half again, to form a long rectangle.
Step 4
Fold the right and left sides up to meet in the center, forming a point at one end.
Step 5
Repeat with the opposite corners.
Step 6
Fold the side corners in so they meet in the center, but don't fold exactly straight. Pull up above the center point, and you'll start to see the ears shape up. The napkin will form a kite shape.
Step 7
Gently turn your napkin over
Step 8
Fold the bottom point up, so that it is roughly 1” above the center of the napkin.
Step 9
Carefully, turn the napkin over again.
Step 10
Roll the left side over, slightly past the center of the napkin.
Step 11
Fold the right side over, tucking the end into the pocket you created on the left side, holding your napkin together.
Step 12
Turn the napkin upright, separating the bottom to form a base. Fluff your bunny’s ears.
Step 13
Cut three pieces of string; knot together in the middle. Slide a safety pin through the back of the folded napkin, through the center of the knot, through the button's opening, then back into the napkin; clasp.


